21
DecAngular lifecycle hooks
Angular lifecycle hooks: An Overview
One of the key features that make Angular versatile is its lifecycle hooks. These hooks enable developers to execute code at specific points in the component lifecycle, allowing for better control over the application's behavior.
In this article, we will delve into the world of Angular lifecycle hooks, exploring their types, purposes, and how they can be effectively leveraged in your applications. Additionally, we'll also delve into an Angular Certification Course and provide a comprehensive Angular Tutorial to help you enhance your skills.
What are Angular Component Lifecycle Hooks?
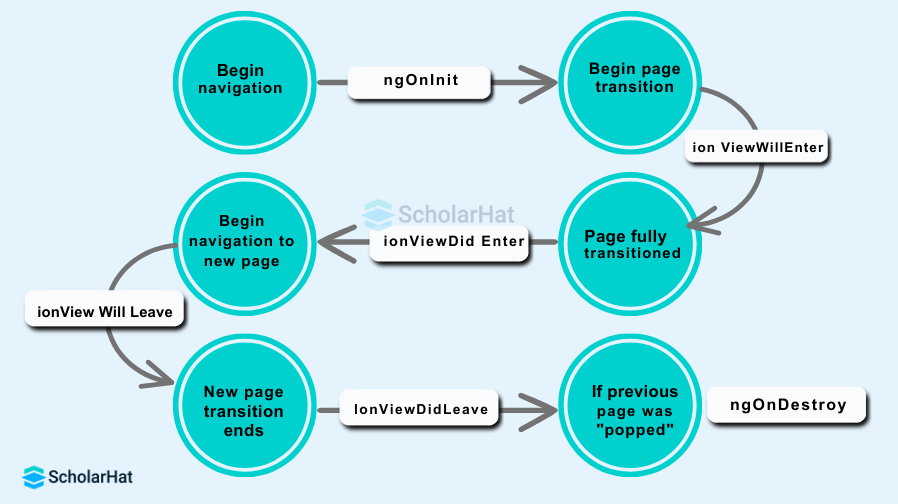
Angular components go through a series of lifecycle phases, starting from creation and ending with destruction. Each phase presents an opportunity for developers to execute custom logic, making it possible to respond to events and manage resources efficiently.
The component lifecycle consists of several hooks, and each hook corresponds to a specific phase in the lifecycle.
Types of Lifecycle Hooks
Angular provides eight lifecycle hooks, categorized into two groups: component lifecycle hooks and directive lifecycle hooks. Let's take a closer look at each type:
Component Lifecycle Hooks
- ngOnChanges: Invoked when an input property binding changes.
- ngOnInit: Called once, after the component is initialized.
- ngDoCheck: Invoked during every change detection run, allowing custom change detection logic.
- ngAfterContentInit: Triggered after content (projected content) has been initialized.
- ngAfterContentChecked: Executed after every check of the content.
Directive Lifecycle Hooks
- ngOnChanges: Similar to the component hook, it is triggered when the directive's input properties change.
- ngOnInit: Analogous to the component hook, it is called once after the directive is initialized.
- ngDoCheck: Similar to the component hook, it allows for custom change detection logic.
- ngOnDestroy: Invoked just before the directive is destroyed.
How to Use Lifecycle Hooks
To leverage these hooks effectively, it's crucial to understand when each one is triggered and what actions are appropriate for each phase. Here's a brief guide on using some of the key hooks:

1. ngOnChanges
Useful for responding to changes in input properties. It receives a SimpleChanges object that provides information about the changes.
ngOnChanges(changes: SimpleChanges) {
  // React to input property changes
}
2. ngOnInit
Ideal for initializing component properties and fetching initial data. This hook is a good place to perform setup tasks that only need to occur once.
ngOnInit() {
  // Initialization logic here
}
3. ngDoCheck
Implement custom change detection logic here. Be cautious with heavy computations, as this hook is called frequently.
ngDoCheck() {
  // Custom change detection logic
}
4. ngAfterContentInit
ngAfterContentInit() {
// After content intialization
}
5. ngAfterContentChecked
ngAfterContentChecked() {
// content check
}
6. ngAfterViewInit
ngAfterViewInit() {
// view intialization
}
7. ngAfterViewChecked
ngAfterViewChecked() {
  // Custom change detection logic
}
8. ngOnDestroy
Cleanup tasks, such as unsubscribing from observables and releasing resources, should be performed in this hook to avoid memory leaks.
ngOnDestroy() {
  // Cleanup logic here
}
Summary
Understanding Angular lifecycle hooks is essential for developing efficient and maintainable applications. By strategically using these hooks, developers can control the behavior of their components at different stages of the lifecycle.
Whether it's initializing data, responding to changes, or cleaning up resources, Angular lifecycle hooks provide a powerful mechanism for creating robust and responsive applications.
FAQs
Take our Angular skill challenge to evaluate yourself!

In less than 5 minutes, with our skill challenge, you can identify your knowledge gaps and strengths in a given skill.


