06
FebBuilding Angular Application with Asp.Net Core
Angular Application with Asp.Net Core: An Overview
Angular is a platform and also a framework that builds single-page client applications, while Asp.Net Core is a high-performance web development framework. Single-page application (SPA) frameworks like Angular can be configured with ASP.NET Core to facilitate the development and publishing process.
In this ASP.NET Core Tutorial, we will see how to create an Angular application with ASP.NET Core which includes the client-side npm package and the required backend middleware. You can also explore dot net training online free with certification to enhance your knowledge at no cost.
Step 1:Create the Project
In Visual Studio 2022, create a new project, select ASP.NET Core with Angular as the project template, and continue with Next.
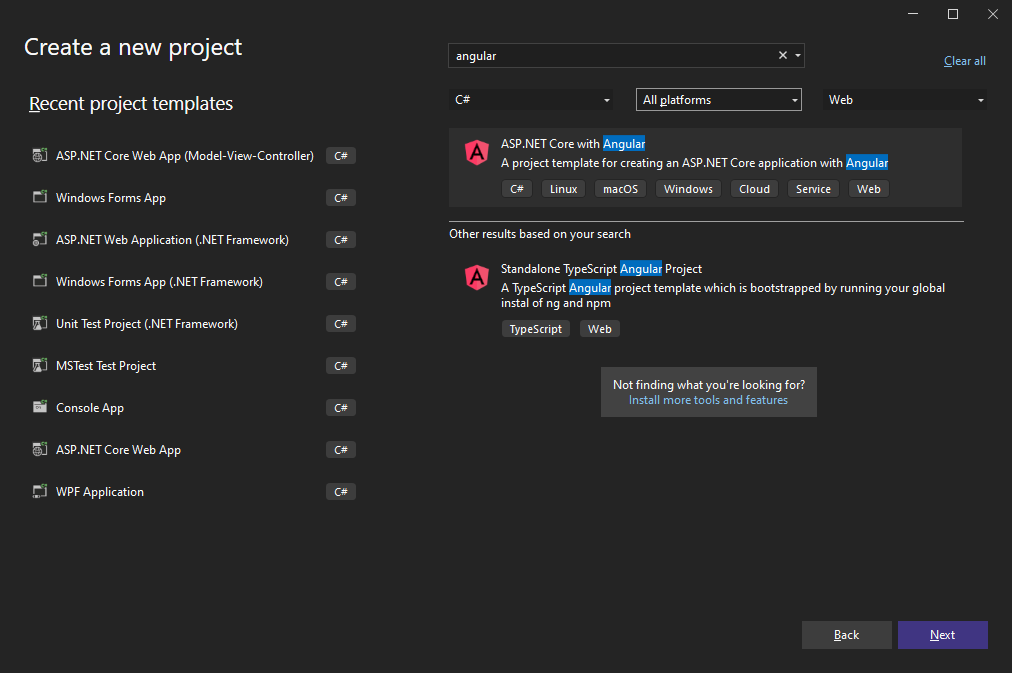
- Select a project name, location, and solution name in the next dialog and confirm with Next.
- In the last dialog, select .NET 6 (Long-term support) as the Framework and confirm with Create.
Step-2 Add NuGet Packages
In the Solution Explorer, select your created project and choose Manage NuGet Packages... from the Project main menu.
1. Select Text Control Offline Packages from the Package source drop-down.
2. Install the latest versions of the following packages:
- TXTextControl.TextControl.ASP.SDK
- TXTextControl.Web
- TXTextControl.Web.DocumentViewer

Step-3 Add the Middleware
Open the Program.cs file located in the project's root folder. Replace the content with the following code:
var builder = WebApplication.CreateBuilder(args);

// Add services to the container.

builder.Services.AddControllersWithViews();

builder.Services.AddCors(p => p.AddPolicy("corsapp", builder =>
{
   builder.WithOrigins("*").AllowAnyMethod().AllowAnyHeader();
}));

var app = builder.Build();

// Configure the HTTP request pipeline.
if (!app.Environment.IsDevelopment()) {
    // The default HSTS value is 30 days. You may want to change this for production scenarios, see https://aka.ms/aspnetcore-hsts.
    app.UseHsts();
}

app.UseHttpsRedirection();
app.UseStaticFiles();
app.UseRouting();
app.UseCors("corsapp");

// enable Web Sockets
app.UseWebSockets();

// adding the TX Text Control WebSocket middleware
app.UseTXWebSocketMiddleware();

// adding the viewer endpoint routing
app.UseEndpoints(endpoints =>
{
   endpoints.MapControllerRoute(
       name: "default",
       pattern: "{controller=TextControl}/{action}");
});

app.MapControllerRoute(
    name: "default",
    pattern: "{controller}/{action=Index}/{id?}");

app.MapFallbackToFile("index.html"); ;

app.Run();
Step-4:Add npm Packages
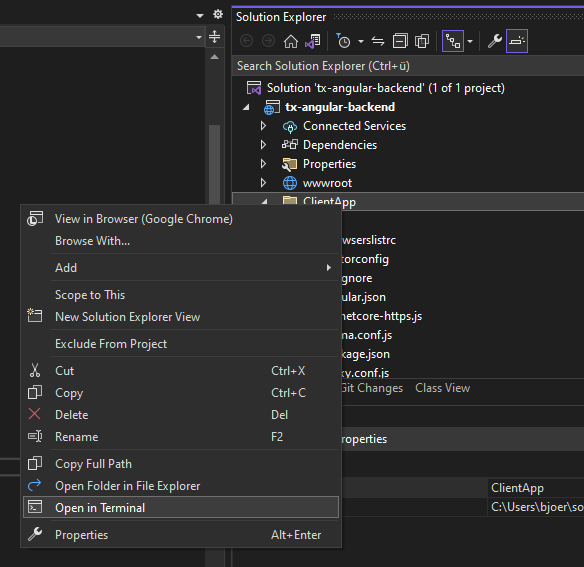
<div style="width: 100%; height: 800px;">
  <tx-document-editor width="100%" height="100%"webSocketURL="wss://localhost:7282/api/TXWebSocket">
</tx-document-editor>
</div>
7. Be sure to replace the port number (7282 in this example) with the port number of your hosting application. You can find this port number in the launchSettings.json file.
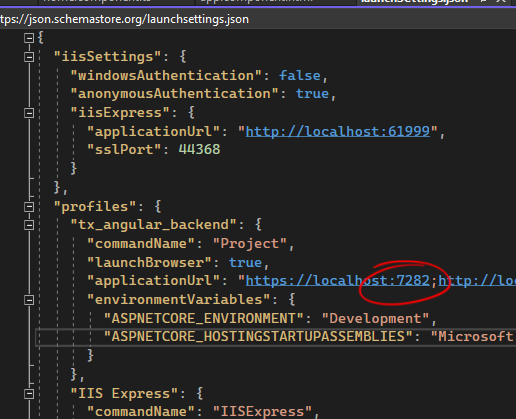
10. Compile and start the application.
Conclusion:
FAQs
Take our Aspnet skill challenge to evaluate yourself!

In less than 5 minutes, with our skill challenge, you can identify your knowledge gaps and strengths in a given skill.

