


22
MayBuilding an ASP.NET Core Application with Angular
24 Sep 2025
Beginner
15.9K Views
7 min read

Learn with an interactive course and practical hands-on labs
Free ASP.NET Core Online Course with Certificate - Start Now
ASP.NET Core Application with Angular
If you are Building an ASP.NET Core Application with Angular there are Angular and React-compatible ASP.NET Core Single Page Application (SPA) templates available in Visual Studio. Each framework's foundation files and directories are included in an integrated Client App folder that the templates provide for your ASP.NET Core projects.
In this ASP.Net Core Tutorial, we will explore step-by-step how to create an ASP.NET Core Application with Angular.
If you're just starting out, there are several dot net training online free with certification programs available that can help you understand the basics while building real-world applications.
Creating ASP.NET Core Application with Angular
Step 1: Install the Essentials
- First, Install the web development workload and ASP.NET version 17.8 or higher of Visual Studio 2022.
- To install Visual Studio for free, you can visit the downloads page.
- Then Go to Tools > Get Tools.
- Features... to launch the Visual Studio Installer if you already have Visual Studio and need to install the workload.
- After selecting ASP.NET and web development, select Modify.
- The Node.js Angular CLI (https://angular.io/cli) comes with npm (https://www.npmjs.com/). This is the version that you can select anytime.
Step 2: Open the Visual Studio
1. Build Front-end App
- Now, Choose Create a new project from the Start window (open by selecting File > Start Window).
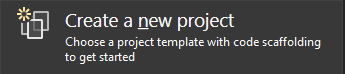
- Please use the search box at the top to find Angular, and then choose Angular with ASP.NET Core.

- After that, Select Create after giving the project the name AngularWithASP.
Solution Explorer
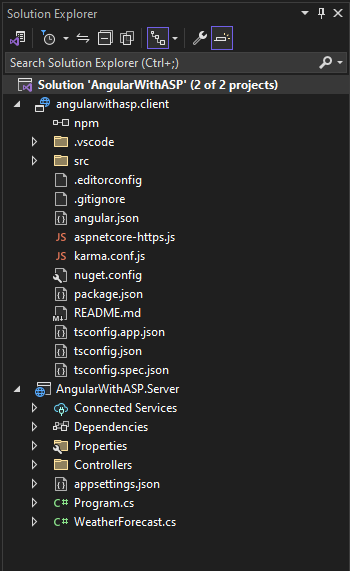
You'll notice several new and modified files for ASP.NET Core integration when compared to the standalone Angular template:
- aspnetcore-https.js
- package.json(modified)
- proxy.conf.js
- angular.json(modified),
- app.module.ts
- app.components.ts
For additional details regarding a few of these project files.
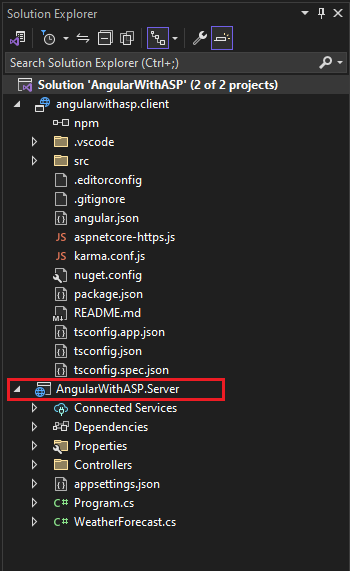
Step 3: Setting the project properties
1. In Solution Explorer, right-click the AngularWithASP.Server project and choose Properties.
2. If either of the profiles is named after an ASP.NET Core project or is https, uncheck the Launch Browser option.
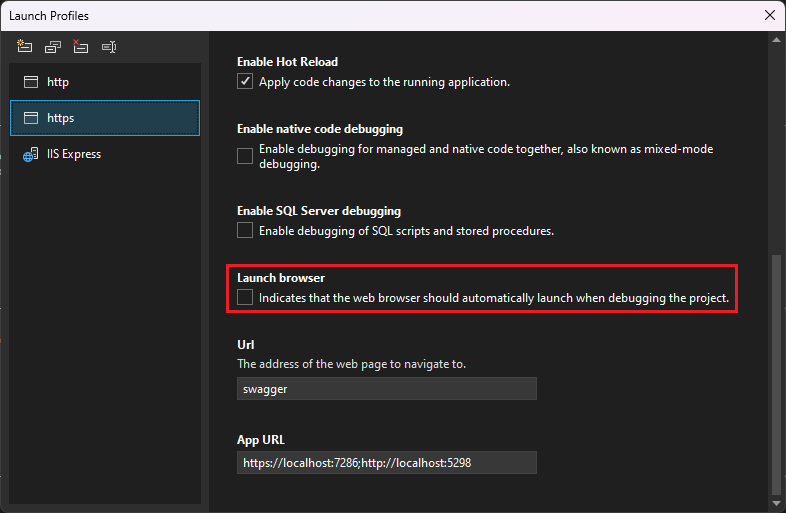
3. This option stops the webpage containing the source meteorological data from opening. In Solution Explorer, right-click the solution and choose Properties. Check that both projects' Actions are set to Start and that the Startup project parameters are set to Multiple Projects.
Step 4: Starting the project
To launch the application, press F5 or click the Start button at the top of the window. There are two command prompts displayed.
- The project executes the ASP.NET Core API.
- Using the ng start command, the Angular CLI.
- The API is used to populate the Angular app as it launches. See Troubleshooting if the app isn't visible to you.
Step 5: Publishing the project
- The Visual Studio Publish tool may be used to publish the integrated solution as of Visual Studio 2022 version 17.3.
- Right-click the AngularWithASP.For the server project in Solution Explorer, choose Add > Project Reference.
- Ensure that the project named angularwithasp.client is chosen.
- Select OK.
- Select Edit Project File by performing a second right-click on the ASP.NET Core project.
- launches the project's.csproj file.
- Verify that the <ReferenceOutputAssembly> element in the project reference of the.csproj file has the value set to false.
- This is how this reference ought to appear.
<ProjectReference Include="..\angularwithasp.client\angularwithasp.client.esproj">
<ReferenceOutputAssembly>false</ReferenceOutputAssembly>
</ProjectReference> app.UseDefaultFiles();
app.UseStaticFiles();
// Configure the HTTP request pipeline.
if (app.Environment.IsDevelopment())
{
app.UseSwagger();
app.UseSwaggerUI();
} Step 6: Troubleshooting Error
1. Proxy error
[HPM] Error occurred while trying to proxy request /weatherforecast from localhost:4200 to https://localhost:5001 (ECONNREFUSED) (https://nodejs.org/api/errors.html#errors_common_system_errors) 2. Verify the port
- Open the launchSettings.json file that is housed in your ASP.NET Core project's Properties folder. To find the port number, use the applicationUrl attribute.
- If there are several applicationUrl properties, locate them using an HTTP endpoint. It should look something like https://localhost:7049.
- Next, open the proxy.conf.js file (located in the src folder) for your Angular project. Update the target property in launchSettings.json to correspond with the applicationUrl property. When you update that value, it should look like this:
target: 'https://localhost:7049', 2. Docker
The following actions should be taken if Docker support is enabled while creating the project:
- Once the application has loaded, use Visual Studio's Containers pane to obtain the Docker HTTPS port. Examine the Ports or Environment tabs.
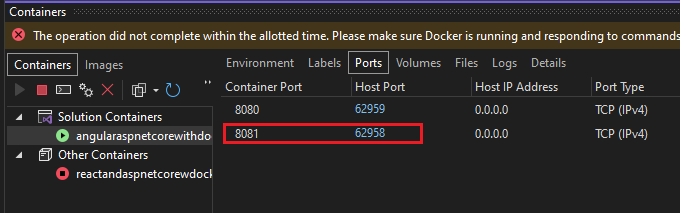
- Open the Angular project's proxy.conf.js file. To match the HTTPS port shown in the Containers pane, update the target variable. For instance, in the code that follows:
const target = env.ASPNETCORE_HTTPS_PORT ? `https://localhost:${env.ASPNETCORE_HTTPS_PORT}` :
env.ASPNETCORE_URLS ? env.ASPNETCORE_URLS.split(';')[0] : 'https://localhost:7209'; 3. Restart the application.
Conclusion:
In this article, we have learned how to build an ASP.NET Core application with Angular. I hope you enjoyed learning these concepts while programming with .Net. Feel free to ask any questions from your side. Your valuable feedback or comments about this article are always welcome.
Boost your salary by 30% with in-demand ASP.NET Core skills. Join our ASP.NET Core Course now!
FAQs
The updated Angular project template provides a convenient starting point for ASP.NET Core apps using Angular and the Angular CLI to implement a rich, client-side user interface (UI).
Create the frontend app
- In the Start window (choose File > Start Window to open), select Create a new project.
- Search for Angular in the search bar at the top and then select Angular and ASP.NET Core.
- Name the project AngularWithASP and then choose Create.
Angular can be classified as a frontend framework, as it is responsible for creating the user interface that is visible and interactive to the user.
Take our Aspnet skill challenge to evaluate yourself!

In less than 5 minutes, with our skill challenge, you can identify your knowledge gaps and strengths in a given skill.