18
JulA Guide to HTML Input Types with Examples
HTML INPUT Types: An Overview
As we discussed in previous articles, HTML <input type=" "> is a crucial HTML form element covered in the HTML Certification Course. The "type" attribute of the input element can take on various values, determining the type of information field it represents. Now, let's dive into a detailed exploration of HTML Input Types, where we will learn everything about each type and its usage.
Input type Text in HTML
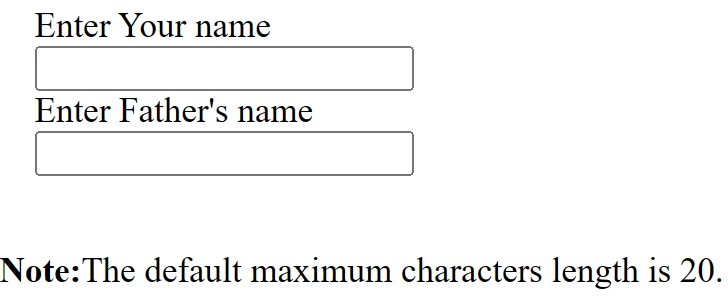
In HTML Forms <input type=”text”> is used to define a single-line input text field.
Example:
<form>
    <label>Enter Your name</label><br>
    <input type="text" name="yourname"><br>
    <label>Enter Father's name</label><br>
    <input type="text" name="father’sname"><br>
    <p><strong>Note:</strong>The default maximum characters length is 20.</p>
</form>
The text input fields for "Your name" and "Father's name" in this HTML form have appropriate labels, and a note indicates that the default input character limit is 20.
Output:
Input type Password in HTML
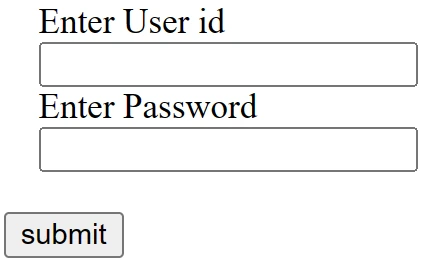
The <input type="password" allows the user to enter a password securely on a webpage. The entered text in the password field is converted into "*" or "." so that another user cannot read it.
Example:
<form>
    <label>Enter User id </label><br>
    <input type="text" name="firstname"><br>
    <label>Enter Password</label><br>
    <input type="Password" name="password"><br>
    <br><input type="submit" value="submit">
</form>
The "User ID" and "Password" fields on this HTML form ask the user for the appropriate labels, and a "Submit" button is provided to send the form's data.
Output:
Input type submit in HTML
The <input type ="submit"> defines a submit button to submit the form to the server after the "click" event occurs.
Example:
<form action="https://https://www.scholarhat.com/">
    <label>Scholar name</label><br>
    <input type="text" name="firstname"><br>
    <label>Enter Password</label><br>
    <input type="Password" name="password"><br>
    <br><input type="submit" value="submit">
</form>
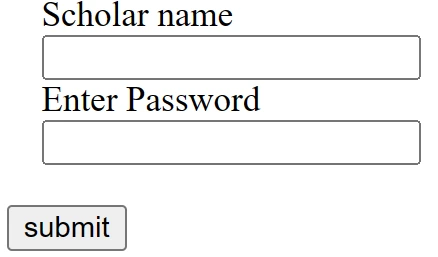
This HTML form asks for a "Scholar name" and "Password" with appropriate labels and is configured to send data to the incorrect URL "https://https://www.scholarhat.com/." It also has a "Submit" button that sends the form's data to the URL (with an extra "https://") given.
Output:
Input type Reset in HTML
The <input type="reset"> is also used to define a button, but when the user performs a click event, it reset all inputted values by default.
Example:
<form>
    <label>User id: </label>
     <input type="text" name="user-id" value="user">
              <label>Password: </label>
     <input type="password" name="pass" value="pass"><br><br>
     <input type="submit" value="login">
      <input type="reset" value="Reset">
</form>
This HTML form includes "Login" and "Reset" buttons for user interaction as well as "User ID" and "Password" fields with the predefined values "user" and "pass" respectively.
Output

Input type Radio in HTML
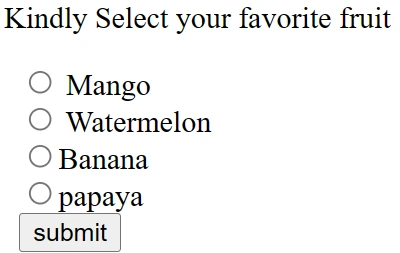
The <input type="radio"> defines radio buttons, which allow the user to choose an option between a set of related options. Only one radio button option can be selected at a time.
Example:
<form>
  <p>Kindly Select your favorite fruit</p>
  <input type="radio" name="fruit" value="mango"> Mango <br>
  <input type="radio" name="fruit" value="watermelon"> Watermelon <br>
  <input type="radio" name="fruit" value="banana">Banana <br>
  <input type="radio" name="fruit" value="papaya">papaya <br>
  <input type="submit" value="submit">
</form>
Mango, Watermelon, Banana, and Papaya are among the fruits that can be picked using the radio buttons on this HTML form. A "Submit" button is then provided to submit the selected selection.
Output:
Input type Checkbox
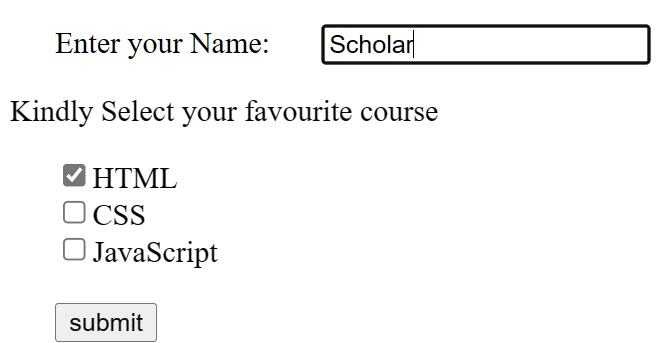
The <input type="checkbox"> is shown as square boxes which can be checked or unchecked by the user to select the choices from the given options.
Note: The "radio" buttons and checkboxes are similar, but there is a difference between them, radio buttons allow the user to select only one option at a time, whereas checkbox allows the user to select zero to multiple options at a time.
Example:
<form>
      <label>Enter your Name:</label>
      <input type="text" name="name">
      <p>Kindly Select your favourite course</p>
      <input type="checkbox" name="course1" value="HTML">HTML<br>
      <input type="checkbox" name="course2" value="css">CSS<br>
      <input type="checkbox" name="course3" value="javascript">JavaScript<br>
     <br>
      <input type="submit" value="submit">
  </form>
This HTML form allows users to select their preferred HTML, CSS, and JavaScript courses by using checkboxes while also collecting their names. A "Submit" button is present for submitting the form's data.
Output:
Input type Button in HTML
The <input type="button"> is used to define a simple push button, which can be programmed to control a functionally of any event such as a click event.
Example:
<form>
     <input type="button" value="Clcik " onclick="alert('you are learning HTML Input Types')">
</form>
This HTML form has just one button with the label "Click," and when that button is pressed, a JavaScript alert appears with the text "You are learning input types in html." The <form> element is not required for this capability, though.
Output:
Input type File in HTML
The <input type="file"> is used to select one or more files from the user's device. Once you select the file, and after submission, this file can be uploaded to the server with the help of JS code and file API.
Example:
<form>
     <label>Select file to upload:</label>
     <input type="file" name="Inputfile">
     <input type="submit" value="submit">
</form>
With the help of the "Select file to upload" label and the "Submit" button, users of this HTML form can choose a file to upload.
Output:

Input type Image in HTML
The <input type="image"> is used to define a submit button as an image.
Example:
<!DOCTYPE html>
<html>
<body>
<h2>Input type "image" .</h2>
<p>We can create an image</p>
  <form>
    <label>User id:</label><br>
     <input type="text" name="name"><br><br>
     <input type="image" alt="Submit" src="login.png" width="100px">
  </form>
 </body> </html>
This HTML page has a form with a "User ID" text input field and a "login.png" source image submit button that users can use to submit the form by clicking.
HTML5 newly added <input> types element
Input type Color in HTML
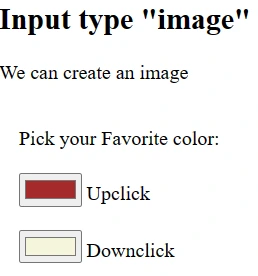
The <input type="color"> defines an input field that contains a color. It allows the user to specify the color by the visual color interface on a browser.
Example:
<form>
    Pick your Favorite color: <br><br>
    <input type="color" name="upclick" value="#a52a2a"> Upclick<br><br>
    <input type="color" name="downclick" value="#f5f5dc"> Downclick
</form>
This HTML form offers two colour picker inputs with the labels "Upclick" and "Downclick," enabling users to choose their preferred colours from the provided default values.
Output:
Input type Date in HTML
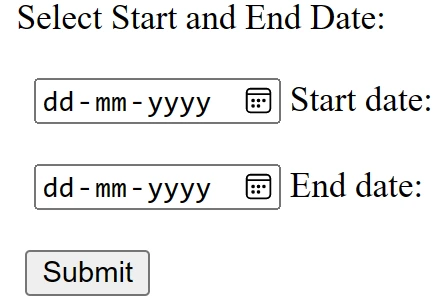
The <input type="date"> creates an input field, which allows the user to input the date in a given format. The user can enter the date by text field or can select from the date picker interface.
Example:
<form>
    Select Start and End Date: <br><br>
      <input type="date" name="startdate"> Start date:<br><br>
      <input type="date" name="enddate"> End date:<br><br>
     <input type="submit">
</form>
The "Submit" button on this HTML form allows users to submit the desired date range after selecting a start and end date using date picker inputs.
Output:
Input type Datetime-local in HTML
The <input type="datetime-local"> creates an input field that allows the user to select the date as well as local time in the hour and minute without time zone information.
Example:
<form>
    <label>
      Select the Class schedule: <br><br>
      Select date & time: <input type="datetime-local" name="classdate"> <br><br>
    </label>
      <input type="submit">
</form>
This HTML form has a "Submit" button that users can use to confirm their choice of a class schedule after entering a date and time in the datetime-local input field.
Output:

Input type Email in HTML
The <input type="email"> creates an input field that allows the user to enter the e-mail address with validation of the pattern. The multiple attributes allow a user to enter more than one email address.
Example:
<form>
         <label><b>Enter your Email-id</b></label>
        <input type="email" name="email" required>
        <input type="submit">
         <p><strong>Note:</strong>User can also enter multiple email addresses: </p>
         <label><b>Enter multiple Email-addresses</b></label>
         <input type="email" name="email" multiple>
        <input type="submit">
</form>
This HTML form provides a "Submit" button and captures an email address after validating it. Additionally, it offers users the choice to enter several email addresses without validating them and submit each one independently using a different "Submit" button.
Output:

Input type Month in HTML
The <input type="month"> is used to create an input field that allows the user to easily enter month and year in the format of "MM, YYYY" where MM defines the month value, and YYYY defines the year value.
Example:
<form>
    <label>Enter your Birth Month-year: </label>
    <input type="month" name="newMonth">
    <input type="submit">
</form>
Users can enter their birth month and year using the month picker input field on this HTML form, which also has a "Submit" button for sending the entered information.
Output;
Input type Number in HTML
The <input> element type number creates an input field that allows a user to enter the numeric value. You can also restrict entering a minimum and maximum value using the min and max attributes.
Example:
<form>
    <label>Enter your age: </label>
    <input type="number" name="num" min="50" max="80">
     <input type="submit">
</form>
With a range of a minimum of 50 and a maximum of 80, this HTML form asks for the user's age as a number. It also has a "Submit" button for entering an age that falls within that range.
Output

Input type URL in HTML
The <input type= "url"> creates an input field that enables the user to enter the URL.
Example:
<form>
    <label>Enter website URL: </label>
    <input type="url" name="website" placeholder="https://www.scholarhat.com/login"><br>
    <input type="submit" value="send data">
</form>
Users can insert a website URL into this HTML form using the placeholder "https://www.scholarhat.com/login," and there is a "send data" button to submit the entered URL.
Output:

Input type Week in HTML
The <input> type week creates an input field that allows a user to select a week and year from the drop-down calendar without a time zone.
Example:
<form>
    <label><b>Select your best week of year:</b></label><br><br>
    <input type="week" name="bestweek">
    <input type="submit" value="Send data">
 </form>
With the help of a week picker input and a "Send data" button, visitors can choose the greatest week of the year using this HTML form.
Output:

Input type Search in HTML
The <input> type "search" creates an input field that allows a user to enter a search string. These are functionally symmetrical to the text input type but may be styled differently.
Example:
<form>
    <label>Search here:</label>
    <input type="search" name="q">
    <input type="submit" value="search">
</form>
The "Search" button on this HTML form allows users to start a search after entering a search term in the search input box.
Output:
Input type Tel in HTML
The <input type=”tel”> is used to create an input field to enter the telephone number. The "tel" type does not have default validation such as email, because telephone number patterns can be different globally.
Example:
<form>
      <label><b>Enter your Telephone Number(in format of xxx-xxx-xxxx):</b></label>
      <input type="tel" name="telephone" pattern="[0-9]{3}-[0-9]{3}-[0-9]{4}" required>
      <input type="submit"><br><br>
   </form>
This HTML form asks for a phone number in the format "xxx-xxx-xxxx," validates it using a predetermined pattern, and has a "Submit" button. The "required" attribute makes sure that the field must be completed before the form can be submitted.
Output:
Input type Hidden in HTML
HTML <input type=”hidden”>defines an input Hidden field. A hidden field also includes data that could not be seen or modified by the users after the submission of the form. A hidden field only stores those database records that need to be updated when submitting the form.
Example
<form action="/tutorial/action.html">
 <fieldset style="background-color:#6495ED;border:2px solid #4238ca;">
 <legend>Edit your profile</legend>

 <input type="text" name="Scholar name" value="Scholar 1"><br /><br />
 <input type="text" name="Father's name" value="Father 1"><br /><br />
 <input type="text" name="course" value="HTML"><br /><br />
 <input type="hidden" name="userId" value="3229440">

 <input type="submit" value="Submit">
 </fieldset>
</form>
In order to change a user's profile, this HTML form has three fields: "Scholar name," "Father's name," and "course," all of which have pre-filled default values. In a themed fieldset, it also has a hidden field for "userId" and a "Submit" button. Data is delivered to the "/tutorial/action.html" URL after being submitted.
Output:
Input type Range in HTML
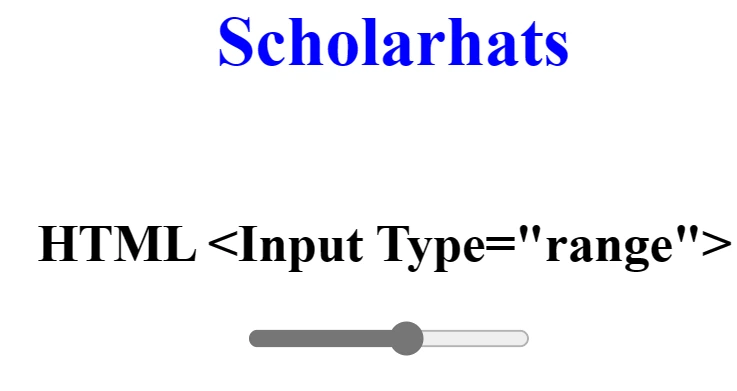
HTML <input type=”range”> is used to define control for a number entered by the user. It can set restrictions on numbers that are not important or values that will be entered by the user. It has a Default range value from 0 to 100.
Example
<!DOCTYPE html>
<html>
<head>
<title>
Input type Range in HTML
</title>
</head>
<style>
#Scholar_p {
font-size: 30px;
color: blue;
}
</style>
<body style="text-align:center;">
<h1 style="color:blue;">
Scholarhats
</h1>
<h2>HTML <Input Type="range">
</h2>
<input type="range"
id="Scholar_Range"
value="90">
</body>
</html>The Scholarhats title and an "Input Type Range" element with a default value of 90 are both visible on this HTML page. Users can slide the range control, and JavaScript can access the chosen value. The text and range control on the website also have some CSS styling.
Output:
Input type time in HTML
We can use <input type=”time”> tag, where the time value can be used in the content. By default, the time control will display the output in 24 hr format. Time can be represented in hh: mm(hours::minutes) format or if you want to add seconds, the format will be changed to hh::mm::ss. The value of an hour can be selected between 0-24 and for minutes, 0-59.
Example
<html>
<body>
   <form>
      <label for="meet">Class Time :</label>
      <input type="time" id="time1">
   </form>
</body>
</html>
This HTML code generates a form with the text "Class Time" and a time input field. However, they are not connected properly since the "for" attribute in the label does not coincide with the "id" of the input field.
Output

HTML Input restrictions
HTML input restrictions, also known as input validation, are used to ensure that users provide input that meets certain requirements or constraints. This is important to prevent errors or incorrect data from being submitted and to provide a better user experience.
Different types of input restrictions can be applied to HTML form fields, such as:
- Required: This attribute specifies that a form field must be filled out before the form can be submitted.
- Minimum and maximum values: These attributes set the minimum and maximum values that can be entered in a numeric input field.
- Length: These attributes set the minimum and maximum length of characters that can be entered in a text input field.
- Pattern: This attribute specifies a regular expression pattern that the input must match. For example, a pattern can be used to validate email addresses or phone numbers.
- Type: This attribute specifies the type of data that can be entered in a field. For example, the "email" type ensures that a valid email address is entered, while the "number" type ensures that only numbers are entered.
- Readonly: This attribute makes the field read-only, meaning that the user cannot modify its value.
- Disabled: This attribute disables the field, making it unclickable and unmodifiable.
| Read More: Top 50 HTML Interview Questions and Answers |
Summary
In this article, you learn that HTML Input types consist of lots of tags, and input types example in HTML each having a role in making a suitable HTML form for the user. If you are looking for something more, look into our HTML Certification Training .
- Input type text: It Defines a one-line text input field.
- Input type password: It Defines a one-line password input field.
- Input type submit: It Defines a submit button to submit the form to the server.
- Input type reset: It Defines a reset button to reset all values in the form.
- Input type radio: It Defines a radio button that allows selecting one option.
- Input type checkbox: It Defines checkboxes that allow selecting multiple options form.
- Input type button: It Defines a simple push button, which can be programmed to perform a task on an event.
- Input type file: It Defines to select the file from device storage.
- Input type image: It Defines a graphical submit button.
- Input type color: Defines an input field with a specific color.
- Input type date: Defines an input field for the selection of date.
- Input type datetime-local: Defines an input field for entering a date without a time zone.
- Input type email: Defines an input field for entering an email address.
- Input type month: Defines a control with month and year, without a time zone.
- Input type number: Defines an input field to enter a number.
- Input type URL: Defines a field for entering URL.
- Input type week: Defines a field to enter the date with week-year, without a time zone.
- Input type Search: Defines a single-line text field for entering a search string
- Input type tel: Defines an input field for entering the telephone number
- Input Type Hidden: It is used to define an input Hidden field.
- Input Type Range: It is used to define control for a number entered by the user.
- Input Type Time: It is used to define the time value in the content.
FAQs
Take our Html skill challenge to evaluate yourself!

In less than 5 minutes, with our skill challenge, you can identify your knowledge gaps and strengths in a given skill.


