28
DecHtml submission by ValidateInput and AllowHtml attribute in MVC4
ValidateInput and AllowHtml attribute :An Overview
Sometimes, you're required to save HTML data in the database. By default, Asp.Net MVC doesn't allow a user to submit HTML to avoid a cross site Scripting attack on your application. In this MVC Tutorial, we will explore more about HTML submission by ValidateInput and AllowHtml attribute in MVC4 which will include validate input vs allow HTML, the difference between validate input and allow HTML, Allow HTML input in a textarea, handling HTML tags in mvc razor. Consider our ASP.NET MVC Course for a better understanding of all MVC core concepts.
Html submission by ValidateInput and AllowHtml attribute
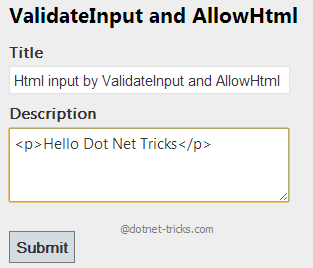
Suppose you have the below form and you can submit the HTML in the description text area.

If you do this and try to submit it you will get the error as shown in fig.

However, if you want to do this, you can achieve it by using ValidateInput attributes and AllowHtml attributes.
ValidateInput Attribute
This is the simple way to allow the submission of HTML. This attribute can enable or disable input validation at the controller level or at any action method.
ValidateInput at Controller Level
[ValidateInput(false)]
public class HomeController : Controller
{
 public ActionResult AddArticle()
 {
 return View();
 }

 [HttpPost]
 public ActionResult AddArticle(BlogModel blog)
 {
 if (ModelState.IsValid)
 {

 }
 return View();
 }
}
Now, the user can submit HTML for this Controller successfully.
ValidateInput at the Action Method Level
public class HomeController : Controller
{
 public ActionResult AddArticle()
 {
 return View();
 }

 [ValidateInput(false)]
 [HttpPost]
 public ActionResult AddArticle(BlogModel blog)
 {
 if (ModelState.IsValid)
 {

 }
 return View();
 }
}
Now, the user can submit HTML for this action method successfully.

Limitation of ValidateInput attribute
This attribute also has an issue since this allows the HTML input for all the properties and that is unsafe. Since you have enabled HTML input for only one or two properties then how to do this? To allow HTML input for a single property, you should use AllowHtml attribute.
AllowHtml Attribute
This is the best way to allow the submission of HTML for a particular property. This attribute will be added to the property of a model to bypass input validation for that property only. This explicit declaration is more secure than the ValidateInput attribute.
using System.ComponentModel.DataAnnotations;
using System.Web.Mvc;

public class BlogModel
{
 [Required]
 [Display(Name = "Title")]
 public string Title { get; set; }

 [AllowHtml]
 [Required]
 [Display(Name = "Description")]
 public string Description{ get; set; }
}
Make sure, you have removed the ValidateInput attribute from Controller or Action method. Now, the user can submit HTML only for the Description property successfully.
The difference between validateInput and allowHTML
Conclusion
So in this article, we have learned about the difference between validate input and allow HTML in MVC4. I hope you enjoyed learning these concepts while programming with Asp.Net. Feel free to ask any questions from your side. Your valuable feedback or comments about this article are always welcome. Level up your career in MVC with our ASP.Net Core Certification


