


08
JanIntegrating Bootstrap with React
11 Sep 2025
Intermediate
13.9K Views
41 min read

Learn with an interactive course and practical hands-on labs
Free React JS Online Course with Certificate - Start Today
Integrating React Bootstrap with your React application allows you to combine the dynamic functionality of React with the responsive, pre-built UI components of Bootstrap. It makes it quick and easy to build modern, attractive web applications without having to write a lot of custom CSS.
In this React tutorial, I’ll walk you through how to integrate React Bootstrap into your React project. Don’t worry. We’ll break it down in a simple and easy-to-understand way, so you can enhance your app’s design in no time. 70% of front-end job listings now require React.js expertise. Don’t get left behind—join our Free React Course with Certificate and build in-demand skills!
How to add Bootstrap to React
Bootstrap is one of the most popular front-end frameworks. Bootstrap includes pre-styled CSS classes, a responsive grid system, and powerful JavaScript plugins, allowing developers to create visually appealing and functional web pages with minimal effort.
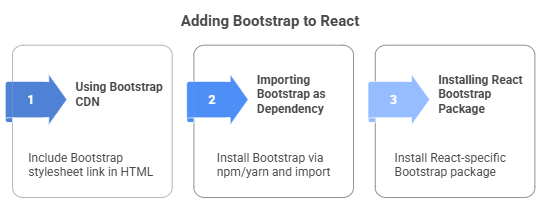
To style your React app using Bootstrap, you can choose from three main methods: directly adding the Bootstrap CDN in your HTML file, using the Bootstrap npm package, or utilizing the React-Bootstrap library, which provides pre-styled React components.
Three methods are the most common ways to integrate Bootstrap with your React JS app:
- Using the Bootstrap CDN
- Importing Bootstrap in React as a Dependency
- Installing a React Bootstrap Package
Each method has its advantages, but they all allow you to use Bootstrap effectively in your React app. Which one fits your needs?
Method 1: Using Bootstrap CDN
This is the simplest way. You can easily add Bootstrap by including a link to the Bootstrap stylesheet in your HTML file.
One of the easiest ways to integrate Bootstrap into your React app is by using BootstrapCDN. The best part is that there's no need for installation or downloads! You can simply add a link in the head section of your app to get started. Here's the link you need to use:
<link rel="stylesheet" href="https://stackpath.bootstrapcdn.com/bootstrap/4.1.0/css/bootstrap.min.css"
integrity="sha384-9gVQ4dYFwwWSjIDZnLEWnxCjeSWFphJiwGPXr1jddIhOegiu1FwO5qRGvFXOdJZ4"
crossorigin="anonymous">
If your app requires JavaScript components in addition to Bootstrap styles, simply add the following <script> tags just before the closing tag:
<script src="https://code.jquery.com/jquery-3.3.1.slim.min.js"
    integrity="sha384-q8i/X+965DzO0rT7abK41JStQIAqVgRVzpbzo5smXKp4YfRvH+8abtTE1Pi6jizo"
    crossorigin="anonymous"></script>

<script src="https://cdnjs.cloudflare.com/ajax/libs/popper.js/1.14.0/umd/popper.min.js"
    integrity="sha384-cs/chFZiN24E4KMATLdqdvsezGxaGsi4hLGOzlXwp5UZB1LY//20VyM2taTB4QvJ"
    crossorigin="anonymous"></script>

<script src="https://stackpath.bootstrapcdn.com/bootstrap/4.1.0/js/bootstrap.min.js"
    integrity="sha384-uefMccjFJAIv6A+rW+L4AHf99KvxDjWSu1z9VI8SKNVmz4sk7buKt/6v9KI65qnm"
    crossorigin="anonymous"></script>
These snippets should be added to the public/index.html page of your React app. Here's an example of how your index.html will look:
<!-- Filename - public/index.html -->

<!DOCTYPE html>
<html lang="en">

<head>
    <meta charset="utf-8" />
    <link rel="icon" href="%PUBLIC_URL%/favicon.ico" />
    <meta name="viewport" content="width=device-width, initial-scale=1" />
    <meta name="theme-color" content="#000000" />
    <meta name="description" content="Web site created using create-react-app" />
    <link rel="apple-touch-icon" />
    <link rel="manifest" href="%PUBLIC_URL%/manifest.json" />

    <!-- Bootstrap CSS link -->
    <link rel="stylesheet" href="https://stackpath.bootstrapcdn.com/bootstrap/4.1.0/css/bootstrap.min.css"
    integrity="sha384-9gVQ4dYFwwWSjIDZnLEWnxCjeSWFphJiwGPXr1jddIhOegiu1FwO5qRGvFXOdJZ4"
    crossorigin="anonymous">

    <title>React App</title>
</head>

<body>
    <noscript>You need to enable JavaScript to run this app.</noscript>
    <div id="root"></div>

    <!-- Bootstrap script files -->
    <script src="https://code.jquery.com/jquery-3.3.1.slim.min.js"
        integrity="sha384-q8i/X+965DzO0rT7abK41JStQIAqVgRVzpbzo5smXKp4YfRvH+8abtTE1Pi6jizo"
        crossorigin="anonymous"></script>

    <script src="https://cdnjs.cloudflare.com/ajax/libs/popper.js/1.14.0/umd/popper.min.js"
        integrity="sha384-cs/chFZiN24E4KMATLdqdvsezGxaGsi4hLGOzlXwp5UZB1LY//20VyM2taTB4QvJ"
        crossorigin="anonymous"></script>

    <script src="https://stackpath.bootstrapcdn.com/bootstrap/4.1.0/js/bootstrap.min.js"
        integrity="sha384-uefMccjFJAIv6A+rW+L4AHf99KvxDjWSu1z9VI8SKNVmz4sk7buKt/6v9KI65qnm"
        crossorigin="anonymous"></script>
</body>

</html>
Now, you can use Bootstrap classes in your React components. Isn't it easy to get started with Bootstrap using the CDN?
Method 2: Import Bootstrap as a Styling Dependency
Install Bootstrap using npm or yarn and import it directly into your React app. This gives you more control over versions and customization.
If you've used a module bundler like Webpack in your application, or even if you've heard about it, this method is another way to add Bootstrap to your React application. You can install Bootstrap as a dependency and use it directly in your React project. To get started, run the following command to install Bootstrap along with supporting libraries like jQuery and Popper.js:
npm i bootstrap jquery popper.js
Once the installation is complete, you'll see the dependencies listed in your package.json file as shown below:
"dependencies": {
    "@testing-library/jest-dom": "^5.17.0",
    "@testing-library/react": "^13.4.0",
    "@testing-library/user-event": "^13.5.0",
    "bootstrap": "^5.3.2",
    "jquery": "^3.7.1",
    "popper.js": "^1.16.1",
    "react": "^18.2.0",
    "react-dom": "^18.2.0",
    "react-router": "^6.17.0",
    "react-scripts": "5.0.1",
    "web-vitals": "^2.1.4"
}
Next, you need to import Bootstrap into your React component. You can do this by adding the following lines to your index.js file:
// Filename - index.js

import 'bootstrap/dist/css/bootstrap.min.css';
import $ from 'jquery';
import Popper from 'popper.js';
import 'bootstrap/dist/js/bootstrap.bundle.min';
import React from 'react';
import ReactDOM from 'react-dom';
import './index.css';
import App from './App';
import registerServiceWorker from './registerServiceWorker';

ReactDOM.render(, document.getElementById('root'));
registerServiceWorker();
Once you've added these imports, your React app will be ready to use Bootstrap styles and components.
Method 3: Install the React-Bootstrap Package
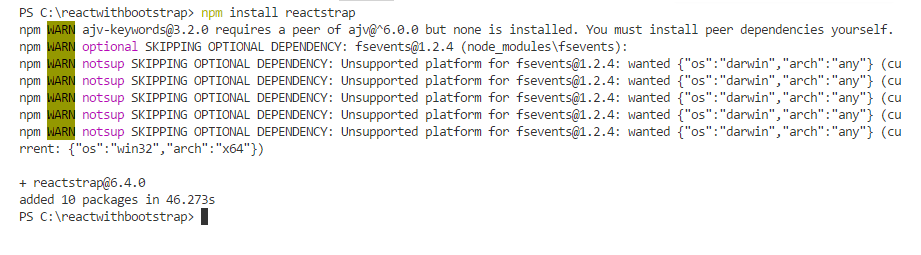
You can install a React-specific Bootstrap package like React-Bootstrap or Reactstrap. These packages provide React-friendly components for smoother integration.
For a React-specific approach, use React-Bootstrap. It offers Bootstrap components tailored for React, eliminating the need to manage traditional Bootstrap JavaScript manually. These components integrate smoothly with React's state and Reactlifecycle.
Create a React App With Bootstrap
To get started, follow these steps:
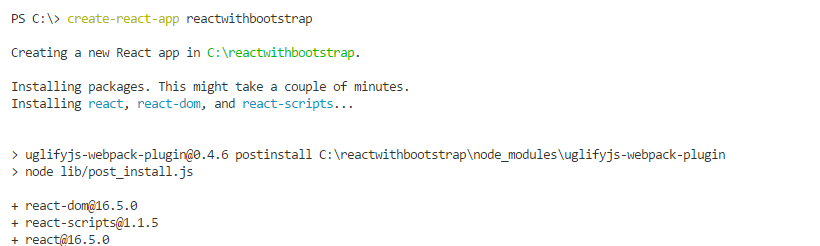
- Step 1: Run the command below to create a new React app on your machine:
create-react-app my-app
- Step 2: Move into your project directory:
cd my-app
- Step 3: Run the command below to install the required dependencies, including Axios (a JavaScript library used to make HTTP requests) along with Bootstrap and Reactstrap:
npm i axios bootstrap reactstrap
In this step, you install Axios as a dependency, which allows you to make API requests in your React application. Now, you have all the tools you need to start building your app with React-Bootstrap components.
Project Structure
Once you’ve installed the dependencies, the project structure will look like this:
After installing the packages, your package.json will include the following dependencies:
"dependencies": {
    "@testing-library/jest-dom": "^5.17.0",
    "@testing-library/react": "^13.4.0",
    "@testing-library/user-event": "^13.5.0",
    "axios": "^1.5.1",
    "bootstrap": "^5.3.2",
    "react": "^18.2.0",
    "react-bootstrap": "^2.9.0",
    "react-dom": "^18.2.0",
    "react-router": "^6.17.0",
    "react-scripts": "5.0.1",
    "web-vitals": "^2.1.4"
}
Here’s a simple implementation example of a web page using React-Bootstrap, featuring a navbar, dropdown, cards, and posts. You can now use these components to build a more structured and responsive UI for your React app.
Create React App with Bootstrap
Want to set up Bootstrap in your React app? This step-by-step guide will walk you through the process of creating a new React application and integrating Bootstrap to style your app. Let’s get started!
Step 1: Create a New React App
Start by creating a fresh React application. Open your terminal or command prompt and run the following command:
create-react-app my-app
This command will create a new directory called my-app and set up all the basic files and dependencies needed for your React project.
Step 2: Move to the Project Directory
Once the app is created, navigate into the project directory by running the following command:
cd my-app
Now, you’re inside your new React app folder, ready to install the necessary dependencies.
Step 3: Install Bootstrap and Reactstrap
To add Bootstrap and Reactstrap (which is a React component library for Bootstrap), run the following command:
npm i axios bootstrap reactstrap
This command will install:
- Axios: A popular library for making HTTP requests in React apps.
- Bootstrap: The well-known CSS framework for building responsive and stylish web pages.
- Reactstrap: React components that use Bootstrap’s CSS classes and features.
Step 4: Update Your App’s Entry Point
Now that you have the dependencies installed, let’s set up Bootstrap and Reactstrap in your project. In your index.js file, add the following imports:
import 'bootstrap/dist/css/bootstrap.min.css';
import $ from 'jquery';
import Popper from 'popper.js';
import 'bootstrap/dist/js/bootstrap.bundle.min';
import React from 'react';
import ReactDOM from 'react-dom';
import './index.css';
import App from './App';
import registerServiceWorker from './registerServiceWorker';

ReactDOM.render(, document.getElementById('root'));
registerServiceWorker();
These imports will enable you to use Bootstrap’s styles and Reactstrap’s components throughout your app.
Step 5: Use Bootstrap Components
Now, you can start using Bootstrap components in your React app. Here’s an example of how to use a Bootstrap navbar with Reactstrap:
import React from 'react';
import { Navbar, Nav } from 'reactstrap';

const App = () => (           My React App              Home
        About           );

export default App;
This simple example shows how to create a responsive navbar using React-Bootstrap’s Navbar and Nav components.
Integrating Bootstrap with React
Want to apply Bootstrap styles to your React components? In this guide, we'll walk through the steps to integrate Bootstrap into your React application and show you how to apply Bootstrap styles directly to your React components. Let's dive in!
Step 1: Install Bootstrap
First, you need to add Bootstrap to your React project. You can do this by using npm to install Bootstrap as a dependency. Run the following command in your terminal:
npm install bootstrap
This will add Bootstrap to your project’s node_modules folder, making it ready for use in your React app.
Step 2: Import Bootstrap CSS in Your Project
Next, import Bootstrap’s CSS file into your React project. You’ll typically do this in your index.js or App.js file. Add the following import statement at the top of your file:
import 'bootstrap/dist/css/bootstrap.min.css';
This imports Bootstrap’s styles, making them available globally throughout your app.
Step 3: Apply Bootstrap Styles in Your React Components
Now that Bootstrap is integrated, you can start applying Bootstrap’s pre-defined classes to your React components. Below is an example of how to use a Bootstrap button and a container in your React component:
import React from 'react';

const MyComponent = () => (      Welcome to My React App    Click Me
  );

export default MyComponent;
In this example:
- The container class is used to center and add padding to the content.
- The btn and btn-primary classes are used to style the button with Bootstrap's primary button style.
Step 4: Use React-Bootstrap Components (Optional)
If you prefer to use Bootstrap components as React components, you can use the React-Bootstrap library. This library provides React-friendly components for Bootstrap, making them easy to integrate into your React application. To install React-Bootstrap, run the following command:
npm install react-bootstrap bootstrap
Once installed, you can use Bootstrap components as React components. Here's an example of a simple React-Bootstrap button:
import React from 'react';
import { Button } from 'react-bootstrap';

const MyComponent = () => (      React-Bootstrap Button    Click Me  );

export default MyComponent;
In this example, the Button component from React-Bootstrap is used, and the variant="primary" prop applies the primary button style.
Step 5: Customize Bootstrap Styles (Optional)
If you want to customize Bootstrap's default styles, you can override them using custom CSS. You can either add a custom CSS file or inline styles in your React components to modify the look and feel of Bootstrap elements. Here's an example:
import React from 'react';
import './App.css'; // Custom CSS file

const MyComponent = () => (      Welcome to My React App
    Click Me  );

export default MyComponent;
In the App.css file, you can define custom styles, for example:
.custom-heading {
  color: #ff6347; /* Custom color for the heading */
}
This will apply a custom color to the heading while still using the Bootstrap button style.
Third-party Libraries for React and Bootstrap
Several third-party libraries integrate Bootstrap with React, offering a more React-friendly approach to using Bootstrap components. Two popular libraries are Reactstrap and React-Bootstrap. Let's explore both in detail.
1. Reactstrap
Reactstrap is a library that provides Bootstrap components as React components. It allows you to use Bootstrap's powerful UI components, but in a way that works seamlessly with React. Reactstrap doesn’t require jQuery or Bootstrap’s JavaScript; it only uses Bootstrap's CSS.
To install Reactstrap and Bootstrap in your React project, use the following command:
npm install reactstrap bootstrap
After installation, you can start using Reactstrap components. Here's an example of using a Button and a Card component:
import React from 'react';
import { Button, Card, CardBody, CardTitle } from 'reactstrap';

const MyComponent = () => (                    Reactstrap Card
        Primary Button            );

export default MyComponent;
In this example, the Button and Card components are imported from reactstrap and used in the component. Notice that the color="primary" prop is used to apply the primary button style, which is similar to Bootstrap's styling but tailored for React components.
2. React-Bootstrap
React-Bootstrap is another popular library that offers Bootstrap components as React components. Unlike Reactstrap, React-Bootstrap fully replaces Bootstrap's JavaScript with React components, making it a more "React-friendly" approach to integrating Bootstrap into your React app. It does not require jQuery, making it a modern, lightweight alternative to Bootstrap's traditional JavaScript.
To install React-Bootstrap in your project, use the following command:
npm install react-bootstrap bootstrap
Here's an example of using a Navbar component with React-Bootstrap:
import React from 'react';
import { Navbar, Nav, NavItem } from 'react-bootstrap';

const MyComponent = () => (

    React-Bootstrap Navbar
                  Home

        About            );

export default MyComponent;
In this example, we use the Navbar, Nav, and NavItem components from React-Bootstrap to create a responsive navigation bar. React-Bootstrap makes it simple to integrate and manage Bootstrap components in your React project.
Comparison of Reactstrap and React-Bootstrap
While both libraries provide Bootstrap components for React, there are some key differences:
- Reactstrap: Uses Bootstrap’s CSS and offers a set of Bootstrap components as React components. It doesn't require jQuery but still relies on Bootstrap’s JavaScript for some components like modals and dropdowns.
- React-Bootstrap: Replaces Bootstrap’s JavaScript entirely with React components. It doesn't require any external JavaScript and is considered more "React-friendly," which makes it a good choice if you want to avoid jQuery or rely purely on React components.
Choose the library based on your preference for handling Bootstrap's JavaScript and how closely you want to integrate with React’s component-based architecture.
Prerequisites
Before you start integrating Bootstrap with React, there are a few necessary tools and knowledge areas you should be familiar with to ensure a smooth development process:
1. Basic Understanding of HTML, CSS, and JavaScript
Bootstrap is primarily based on HTML and CSS, so a fundamental understanding of these technologies is crucial. You should be comfortable working with:
- HTML: Understanding the structure of web pages, including elements like divs, headers, and links.
- CSS: Knowledge of styling elements using CSS, including layout, colors, and typography.
- JavaScript: A basic understanding of JavaScript is essential for manipulating DOM elements and handling interactivity in React components.
| Read More: DOM and BOM in JavaScript |
2. Basic Knowledge of React
React is a JavaScript library used to build user interfaces. Familiarity with the following React concepts is necessary to integrate Bootstrap smoothly into your React app:
- Components: Understanding how to create, import, and export React components is essential when using Bootstrap components.
- State and Props: React’s state and props allow you to manage dynamic content and pass data between components.
- JSX: React uses JSX (JavaScript XML), a syntax extension that lets you write HTML-like code inside JavaScript. You need to understand React JSXto use Bootstrap components effectively within React.
| Read More: React Router DOM NPM |
3. Node.js and npm (Node Package Manager)
To work with React and install external libraries like Bootstrap, you need Node.js and npm installed on your machine:
- Node.js:Node.js JavaScript runtime used for server-side scripting. You can download it from Node.js official site.
- npm: Node Package Manager, which comes with Node.js, helps you manage dependencies and install libraries like React and Bootstrap.
4. Basic Knowledge of npm (Node Package Manager)
You need to be comfortable with the following npm commands for installing packages and running your project:
- npm install: Installs dependencies listed in your
package.jsonfile. - npm start: Starts the React development server to run your app locally.
5. Text Editor or IDE
You'll need a text editor or integrated development environment (IDE) to write and edit your code. Some popular options include:
- Visual Studio Code (VS Code): A lightweight and powerful editor with great support for JavaScript and React.
- WebStorm: A full-featured IDE for JavaScript development that includes React-specific tools.
- Atom: A customizable text editor that's good for React development.
| Read More: Top 10 Visual Studio Keyboard Shortcuts |
6. A Web Browser
You'll need a modern web browser (like Chrome, Firefox, or Edge) to run and test your React app. Browser Developer Tools will also help you debug your code and inspect elements on the web page.
7. Optional: Version Control (Git)
While not mandatory, it’s a good idea to use Git for version control to manage changes to your project. Git allows you to track your code changes, collaborate with others, and maintain backups of your project on platforms like GitHub.
Once you have a solid understanding of the prerequisites above, you're ready to start building React applications using Bootstrap!
Summary
In this article, we’ve walked you through integrating Bootstrap with React. We’ve covered various methods, including using the Bootstrap CDN, importing it as a styling dependency, and installing the React-Bootstrap package. By now, you should have a clear understanding of how to integrate Bootstrap with React to create responsive, stylish applications.
Without advanced React.js skills, you’ll be stuck in low-paying roles. Enroll in our React Certification Course now and break into high-demand jobs!
Test Your Knowledge of Integrating Bootstrap with React!
Q 1: Which library helps to use Bootstrap easily with React?
- (a) react-bootstrap
- (b) react-style
- (c) bootstrap-react
- (d) styled-components
Q 2: How can you include Bootstrap CSS in a React project?
- (a) By importing it in the JavaScript file
- (b) By adding a CDN link in the public/index.html
- (c) Both (a) and (b)
- (d) None of the above
Q 3: What does the `react-bootstrap` package provide?
- (a) A set of React components styled using Bootstrap
- (b) CSS classes for custom components
- (c) JavaScript functionality for Bootstrap
- (d) Templates for React projects
Q 4: How do you use a Bootstrap Modal in React with `react-bootstrap`?
- (a) By using the
<Modal>component - (b) By writing custom CSS for modals
- (c) By importing Bootstrap JavaScript files
- (d) By modifying the React DOM directly
Q 5: What is the advantage of using `react-bootstrap` over plain Bootstrap?
- (a) It provides React components with Bootstrap styling
- (b) It eliminates the need to manipulate the DOM directly
- (c) It ensures better integration with React’s virtual DOM
- (d) All of the above
FAQs
Yes, you can definitely use Bootstrap with React as Bootstrap contains components and utilities which can be easily integrated into React applications.
You can add Bootstrap in React JS in many ways:
- Bootstrap's CSS file can be manually imported into your project.
- You can use the React-Bootstrap library.
- You can also use other UI libraries that are built on top of Bootstrap.
Yes, there are many such UI libraries like Material-UI, Semantic UI React and Ant Design.
Take our React skill challenge to evaluate yourself!

In less than 5 minutes, with our skill challenge, you can identify your knowledge gaps and strengths in a given skill.